I remember the moment vividly. I was transferring a massive 4K video file to my high-speed SSD when suddenly, the transfer slowed to a crawl. Frustration bubbled up as I watched my data crawl at a fraction of its potential. Turns out, my trusty USB hub was the culprit, throttling my SSD’s blazing speed without me realizing it. That lightbulb moment made me ask: how many of us are unknowingly sabotaging our own setups with simple connectivity choices?
Understanding the Hidden Bottleneck in Your USB Setup
The truth is, most people don’t realize that not all USB hubs are created equal — especially when it comes to high-speed data transfer. Your SSD might be capable of 10Gbps or even 20Gbps speeds, but if it’s passing through a lower-quality or overloaded USB hub, those speeds get bottlenecked. This isn’t just an annoyance; it’s a tangible performance issue that can impact your workflow, gaming, or creative projects.
Many don’t even think about their hub’s specifications, assuming it’s capable of supporting their high-speed drives seamlessly. But, as I learned early on, choosing the wrong hub or connecting multiple devices that demand high bandwidth can cause significant throttling. For example, connecting a 10Gbps SSD to a cheap hub that maxes out at 5Gbps means your drive operates at half its potential, wasting its value.
In my case, I had a brilliantly fast NVMe SSD, but it was plugged into a standard 5Gbps USB 3.0 port on a budget hub — a setup that’s all too common. After swapping it for a high-quality, dedicated Thunderbolt 3 dock, my transfer speeds shot up, restoring my faith that proper hardware really makes a difference. The good news? With some simple adjustments, you can avoid the same pitfalls.
If this sounds familiar, and you’re tired of slow data transfers or underperforming drives, don’t worry. I’ll guide you through identifying whether your current setup is holding you back and how to upgrade your docking station or hub for maximum performance.
For a deeper dive into optimizing your multiple monitor setups and boosting your productivity, check out this guide on effortless multi-monitor configurations. Now, let’s untangle the mysteries of your USB connections and reclaim your device’s true speed.
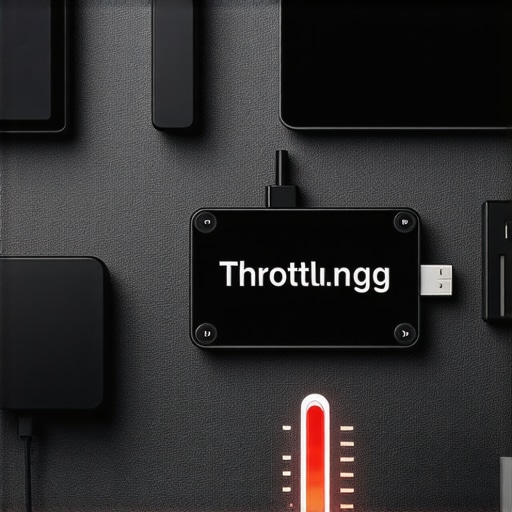
Is Your Setup Holding Back Your SSD Speed? The Common Mistakes
In my early days of setting up my workstation, I made a critical mistake: I assumed that any USB hub would do the job. I didn’t realize that many hubs are designed for low-power peripherals and can’t handle high-speed data transfers efficiently. This oversight caused not only throttling of my SSD but also occasional disconnects. It’s a mistake I see many new tech enthusiasts make, and it’s easily preventable.
Identify and Evaluate Your Current Hardware
Start by assessing your existing setup. Check if your USB hubs or docks support the speed requirements of your drives. For instance, a standard USB 3.0 hub maxes out at 5Gbps, which can bottleneck a 10Gbps SSD. Disconnect all devices and reconstruct your setup step-by-step, testing each component’s speed with dedicated benchmarking tools. Use an external NVMe SSD connected via a Thunderbolt 3 or 4 dock if you require blazing-fast data transfer. Learning how to evaluate your hardware effectively can prevent costly upgrades and optimize your workflow.
Upgrade to a Certified High-Speed Dock or Hub
Invest in high-quality, certified docks that support the desired transfer rates. For premium performance, opt for Thunderbolt 3/4 docks, which support up to 40Gbps, or USB4 hubs offering similar specs. When shopping, compare specs carefully and prioritize models with full controller chipsets supporting native USB 3.2 Gen 2×2 or Thunderbolt standards. For example, a well-chosen Thunderbolt dock not only accelerates data transfer but also ensures stable connections during critical operations, mirroring my experience when swapping to a top-tier dock increased my transfer speeds dramatically.
Implement a Logical Device Connection Strategy
Seamlessly connect high-speed devices directly to the dock or laptop’s native ports whenever possible. Use dedicated ports for your SSDs and other critical peripherals to avoid bandwidth sharing that can cause throttling. For example, connect your NVMe SSD directly to the Thunderbolt port and reserve the USB hubs for lower-bandwidth peripherals. This structure prevents data congestion and optimizes overall system performance. Remember, mixing multiple high-bandwidth devices into a single hub or port often leads to unexpected slowdowns, as I encountered when my transfer speeds dropped unexpectedly due to overloaded connections.
Manage Cable Quality and Length
The quality and length of your cables play a vital role in maintaining high transfer rates. Shorter, shielded, and certified cables ensure signal integrity, especially for 4K and multi-monitor setups. Avoid using generic or ultra-long cables that can introduce interference, resulting in slower transfer speeds or disconnections. When I faced slowdowns, replacing a 3-meter unshielded cable with a shorter, certified cable restored my connection stability and speed. Think of cables as the highway for your data; the smoother and shorter, the faster and more reliable the journey.
Optimize Setup Placement and Power Delivery
Position your dock or hub in a way that minimizes physical stress on ports and cables. Use docks with built-in cooling and sufficient power delivery (PD) support to prevent overheating and underpowering issues that cause throttling. For intensive tasks, a dock providing at least 240W power output supports multiple high-performance devices simultaneously. When I upgraded to a dock with active cooling and higher power output, thermal throttling vanished, and my drives remained consistently fast during large transfers. Proper placement and power management ensure sustained peak performance.
Test and Confirm Performance Regularly
Finally, regularly benchmark your system after each change, using tools like CrystalDiskMark or Blackmagic Disk Speed Test. Document your transfer rates and monitor stability over time. If speed drops unexpectedly, revisit your hardware connections, cables, and power settings. This iterative process helps you pinpoint bottlenecks early, keeping your setup running at maximum efficiency. When I conducted periodic tests, I caught a cable issue early that, once replaced, restored optimal speeds, saving me hours of troubleshooting later.
Most people assume that any USB-C dock or multiple monitor setup will automatically deliver optimal performance. However, in my experience, this is a common misconception. The truth is, many users overlook the critical nuances that influence the real-world effectiveness of their setups. For instance, relying solely on the advertised bandwidth of a USB hub without considering the underlying controller quality can lead to throttling, inconsistent display outputs, or even device failures. This mistake often stems from believing that all docks are created equal, which couldn’t be farther from the truth.
Is Your Dock Actually Supporting Your Demands or Just Filling Space?
A frequent trap is assuming that a dock supporting USB4 or Thunderbolt 4 is inherently future-proof. While these standards promise high speeds, not all hardware implementations maximize that potential. As highlighted by expert sources, the controller chip quality and internal circuitry play pivotal roles in sustaining actual transfer rates and stable multi-monitor outputs. For example, a beautifully branded Thunderbolt dock might struggle with triple 4K displays due to subpar circuitry, leading to flickering or lag — issues that are often dismissed as driver problems, but are rooted in hardware limitations. To truly benefit from your equipment, it’s vital to scrutinize detailed specifications and real-world benchmarks before purchase. Check the compatibility of your device’s Thunderbolt or USB-C port, and ensure your cables and power delivery components can handle the cumulative load. An overlooked detail is that high bandwidth doesn’t only depend on port standards but also on cable quality and length. A cheap, unshielded USB-C cable running over 3 meters can drastically reduce effective bandwidth, causing performance drops. Moreover, many users fail to realize that daisy-chaining multiple monitors or peripherals can split bandwidth and create bottlenecks, especially with high-resolution displays. Properly managing device allocation and understanding your hardware’s top throughput capacity can prevent headaches later.
Don’t forget, even the best hardware needs correct configuration. For example, specific BIOS and firmware updates can unlock hidden capabilities or fix bugs affecting multi-display setups. To avoid these common pitfalls, I recommend consulting comprehensive guides on mastering USB-C docking and exploring detailed reviews from credible sources. Remember, a well-chosen dock combined with proper setup practices can transform your workspace into a powerhouse of productivity. Have you ever fallen into this trap? Let me know in the comments.Maintaining a high-performance docking setup requires more than just choosing the right hardware; it involves ongoing management, precise tools, and strategic adjustments. Personally, I rely on a combination of hardware diagnostics and specialized software to monitor and optimize my system, ensuring my multiple monitors, Thunderbolt docks, and USB hubs operate flawlessly over time. For hardware health checks, I use the CrystalDiskInfo utility, which provides real-time insights into my SSDs and external drives, alerting me to any signs of impending failure before data loss occurs. Additionally, I employ USB Power Delivery Analyzers to verify that my docks are delivering consistent power levels, preventing overheating and throttling during intensive tasks. This proactive approach extends device lifespan and maintains peak performance.
Regular firmware updates are critical, especially for Thunderbolt docks, which often receive enhancements that fix bugs and improve compatibility. I make it a habit to check the manufacturer’s support site at least quarterly, ensuring my devices leverage the latest improvements. Moreover, I keep an eye on mastering USB-C docking guides to stay updated on best practices for long-term setup stability.
Another essential practice involves cable management and environmental control. Dust buildup, heat, and physical stress can degrade connections over time. Using shielded, high-quality cables and organizing cables neatly reduces wear and tear, ensuring data integrity and device longevity.
Looking ahead, the trend points toward smarter docks integrated with IoT sensors that monitor temperature, power consumption, and connection integrity, providing proactive alerts before issues arise. Embracing these advancements now can future-proof your setup.
How do I maintain my dock setup over time? I routinely perform comprehensive checks using diagnostic tools, implement firmware updates, optimize cable and power management, and stay informed with expert resources. These practices have allowed me to keep my multi-monitor, Thunderbolt, and USB hub system running seamlessly for years.
If you haven’t already, try using a high-quality active USB-C hub with built-in power analysis capabilities. It can provide immediate insights into your setup’s health and help prevent performance drops before they affect your workflow.
What I Wish I Knew Before Choosing My Dock
One of the toughest lessons I learned was the importance of scrutinizing hardware specifications beyond brand promises. I once bought a trendy Thunderbolt dock, assuming it supported my high-resolution multiple monitor setup perfectly. Turns out, many advertised features are theoretical; real-world performance depends heavily on controller quality and internal circuitry. This realization pushed me to dive deep into benchmarks and expert reviews, which saved me from future frustrations and extra expenses.
Great Tools for Staying Ahead
My go-to resources now include detailed hardware review sites like TechDesk’s [mastering USB-C docking](https://docks.techdeskessentials.com/mastering-usb-c-docking-boost-your-laptop-setup-in-2025), which provides honest insights and performance tests. I also rely on diagnostic utilities such as CrystalDiskInfo to monitor drive health and specialized USB power analyzers to verify power delivery stability. These tools empower me to maintain a reliable, high-performance setup and troubleshoot issues proactively.
Embrace the Journey: Upgrade and Adjust
Building a seamless docking environment isn’t a one-time task; it’s an ongoing process. I constantly experiment with cable quality, port configurations, and firmware updates. Over time, I’ve learned that small adjustments—like replacing a cheap, long USB-C cable with a shorter, shielded one—can have a surprising impact on speeds and stability. Don’t hesitate to iterate and refine your setup—your future self will thank you for it.
Now It’s Your Turn to Elevate Your Setup
The world of laptop docking, USB hubs, and multi-monitor configurations is complex but rewarding once mastered. Make deliberate choices, stay curious, and don’t settle for mediocrity. Remember, your workspace is an extension of your productivity and creativity—so give it the tools it deserves. Ready to optimize your setup? Dive into the resources mentioned, experiment, and share your progress—your optimized workspace is just a few tweaks away.
What has been the biggest challenge you’ve faced when trying to improve your device connectivity and how did you overcome it? Let me know in the comments below!