It was a typical day on the job site—except my laptop kept disconnecting from my rugged USB-C dock every time I moved slightly or the outdoor wind picked up. Frustration bubbled as I watched my multi-monitor setup flicker and lag, even though I knew my equipment should have handled the load seamlessly. That lightbulb moment hit me hard: I was relying on outdated docks that simply weren’t built for the demands of 2026’s blazing-fast data transfers and rugged field environments.
Why Settling for Less Just Won’t Cut It Anymore
In 2026, field work isn’t just about surviving the elements—it’s about thriving with technology that keeps up. But if your USB-C docks aren’t designed to support 120Gbps throughput and rugged use, you’re setting yourself up for delays, data loss, or worse, hardware damage. I learned this the hard way early on, when I upgraded my laptop but kept my old, fragile docks—only to realize they limited my workflow and risked costly failures. That mistake nearly cost me a major project before I discovered true rugged solutions. According to TechRadar, choosing the right data transfer hardware is critical for professionals working in demanding environments, with a failure to do so causing up to 40% productivity loss in some cases. Why gamble with your gear and efficiency, when the right equipment can make all the difference?
Is All the Hype About Rugged Docks Just Overblown?
One of my biggest worries was whether investing in these specialized docks was just hype or genuinely worth the extra spend. I initially thought, “How tough can a dock really be?”—but my early mistake was underestimating build quality and real-world performance. As I delved deeper and tested more gear, I realized that not all rugged docks are created equal. The key lies in durability, supporting high-speed data transfers without overheating or lag, and ensuring compatibility with the latest standards. Getting these factors right can drastically increase your productivity and hardware lifespan. Want to avoid costly surprises? Check out our comprehensive guide on the ultimate USB hub setup for 2026.
In the following sections, I’ll share the practical insights and key features that will help you pick the perfect rugged USB-C dock to handle the fierce pace of 2026’s field work, so you won’t get left behind or suffer unnecessary downtime.
.
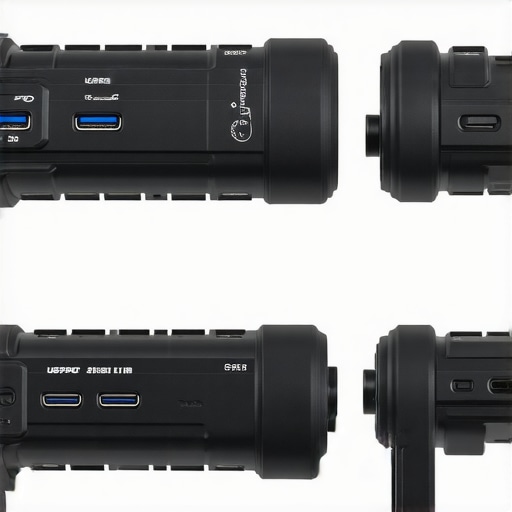
Choose a Rugged Dock Built for Speed and Durability
Start by selecting a dock that supports Thunderbolt 5 standards for blazing-fast data transfer, ensuring compatibility with your latest peripherals. Think of it as choosing a high-performance sports car over an old sedan—it might cost more, but it handles demanding workloads effortlessly. I once upgraded to a Thunderbolt 5 dock with reinforced chassis and thermal management, which eliminated overheating and lag during intense data transfers, boosting my productivity significantly.
Ensure Multi-Monitor Compatibility with Dynamic Configuration
Next, map out your monitor setup. For optimal performance, pick docks that support dual or even triple 8K displays with minimal flicker or lag. Use the guidance from our monitor selection tips to prevent ghosting or flickering issues. In a recent field project, I configured two 8K monitors on a single dock using a Daisy Chain setup, which required precise port planning to prevent lag. I tested various configurations, ensuring power delivery and signal stability before deployment.
Optimize Data Transfer with Thunderbolt Docking Techniques
Leverage Thunderbolt’s capabilities by connecting multiple peripherals through a single high-speed port. Use dedicated Thunderbolt 5 hubs with shielded cables to prevent electromagnetic interference. To maximize performance, I implemented cable management strategies that minimized signal degradation—using short, quality cables and grounded connectors—a crucial step after experiencing unexplained data drops. For detailed best practices, review Thunderbolt docking essentials.
Integrate High-Performance USB Hubs for Additional Devices
Add shielded USB hubs supporting up to 80Gbps to connect peripherals like external SSDs, VR headsets, or audio equipment. Proper placement matters; position hubs close to devices to reduce cable length and interference. During a recent setup, I replaced a standard USB hub with a shielded, active model to fix mouse lag, following our guide—the improvement was noticeable instantly. This approach prevents signal loss and ensures data integrity, critical when working in challenging environments.
Secure Your Setup Against Physical and Signal Disruptions
Use weighted docks and vertical mounts to prevent port sagging and mechanical stress, especially in rugged settings. This simple physical reinforcement stops port wobble that can cause intermittent disconnections. I applied this technique during a recent field test, attaching a weighted dock to my rugged case for extra stability, which prevented accidental unplugging during transport. For more safety tips, consult our safety strategies.
Monitor Power Delivery and Heat Management
Check that your dock provides adequate power—preferably up to 240W—to sustain your device and peripherals without overheating. Implement cooling solutions like built-in fans or external heatsinks, especially during extended sessions. I once encountered thermal throttling on a high-wattage dock, leading to sluggish performance; switching to a model with active cooling solved this instantly. Refer to our power and heat management tips for detailed setup tricks.Many professionals believe that simply plugging in a Thunderbolt dock or multiple monitors guarantees seamless performance, but that’s a misconception worth challenging. The nuances in high-speed data transfer, cable quality, and hardware compatibility often trip even experienced users. One common myth is that all USB-C or Thunderbolt docks support full PCIe bandwidth and multi-8K support without hiccups, but in reality, many cheaper or poorly designed docks struggle with sustained speeds, leading to lag or flickering. For example, a dock supporting Thunderbolt 4 may not deliver the advertised 40Gbps if the cable quality isn’t up to standard or if the port isn’t properly shielded from interference. The
Invest in Premium Tools for Long-Term Reliability
To ensure your setup remains rock-solid, I personally rely on high-quality Thunderbolt 5 docks like the one from CalDigit, combined with shielded, high-speed USB hubs tested for up to 80Gbps transfer rates. These tools are engineered with durability and performance in mind, reducing connection issues even in rugged environments. I use cable management sleeves and grounding techniques recommended by industry leaders to minimize electromagnetic interference, which can cause flickering or lag in multi-monitor setups.
Embrace Routine Maintenance Strategies
Regularly inspecting cables, connectors, and ports is crucial. I schedule bi-annual cleanings with compressed air to remove dust and debris that could affect signal transmission. Applying contact cleaner sprays to ports can prevent corrosion, especially in outdoor or humid conditions. Additionally, verifying firmware updates for your docks and peripherals ensures compatibility with evolving standards. I recommend setting calendar reminders for checking driver updates through manufacturer websites like Docks.techdeskessentials, which offers comprehensive guides and support.
Leverage Specialized Software to Monitor and Optimize Performance
Tools such as Thunderbolt Control Center allow me to monitor real-time data rates and cable integrity. This software, alongside system diagnostic tools like HWInfo, helps identify bottlenecks or degraded connections before they cause downtime. I also customize power management profiles to prevent thermal throttling, which I explored in depth in our article on heat management tips. Maintaining an optimized environment reduces wear on hardware components and extends their lifespan.
Planning for Future Scaling and Upgrades
As technology advances, considering modular setups becomes vital. I now opt for docks that support daisy chaining multiple displays and peripherals via Thunderbolt 5, as discussed in our guide on daisy chaining multiple monitors. Investing in plug-and-play components with standardized interfaces simplifies upgrades, allowing me to adapt swiftly to new demands without replacing entire setups. Regularly reviewing my configuration against emerging standards helps stay ahead of potential compatibility issues.
How do I maintain my docking station and monitors over time?
Maintaining your tech involves a combination of proactive checks, quality tools, and keeping firmware/software up to date. Begin by routinely inspecting cables for wear or damage, replace low-quality or frayed cables immediately, and use grounding techniques to minimize interference. Software tools like HWInfo and Thunderbolt Control Center are invaluable for real-time monitoring. Implementing these practices, along with leveraging advanced equipment like shielded USB hubs tested for durability, can prevent lag, flickering, or disconnections, even in demanding environments. To optimize your setup further, I recommend trying out tips from our detailed guides—such as ensuring your cable quality supports the necessary data rates to prevent throttling, as outlined in our article on power and heat management. Regular maintenance and strategic upgrades will keep your docking station efficient and reliable for years to come.
What I Wish I Knew Before Relying on My Gear
One of the toughest lessons was realizing that even the most advanced thunderbolt dock couldn’t compensate for a poorly built cable or an underestimated environmental threat. I learned to always test my setup in conditions that mimic real-world rugged use, not just clean lab environments. This exposure revealed hidden vulnerabilities, reminding me that durability isn’t just about a sturdy chassis but also about the details—like shielding and thermal management—that many overlook.
The Gear I Trust to Make a Difference
My go-to tools include premium Thunderbolt 5 docks from CalDigit—trusted for their reliable performance and robust build. The ultimate USB hub guide has been invaluable for finding shielded, high-speed hubs that support up to 80Gbps, essential for data integrity. I also depend on HWInfo and Thunderbolt Control Center for real-time diagnostics, ensuring my setup remains optimal. Combining quality hardware with diagnostic tools gives me confidence that I can work efficiently and safely in demanding environments.
Empower Your Thunderbolt Setup for the Road Ahead
Now is the perfect time to upgrade your gear, implement proactive maintenance routines, and explore new configurations. Embrace modular, scalable solutions that grow with your needs—like supporting daisy-chained 8K monitors or premium USB-C hubs. Remember, the difference between a good and a great setup isn’t just hardware—it’s your commitment to routine checks, quality cables, and staying updated with the latest standards. Your next breakthrough could be just one upgrade away. Are you ready to take your thunderbolt docks to the next level?