I’ll never forget the frustration of trying to game or work across three stunning 4K displays, only to be met with flickering screens, lag, or worse—a complete black screen. It was a moment of clarity when I realized that my trusty old USB-C hub just couldn’t handle the demanding load of triple 4K at 240Hz. I had invested in every new tech gadget and read countless reviews, but nothing seemed to deliver the performance I craved. Sound familiar?
Why Most Hubs Fail to Keep Up with the 2026 4K Demands
Back in early 2026, I hit a wall that many creative professionals and gamers face: finding a hub that can reliably run three 4K monitors at a blistering 240Hz. And let me tell you—it’s not just about plugging in multiple screens. The hub must transmit massive data streams at over 80Gbps, power all your peripherals, and keep your setup stable without overheating or flickering. The complexity is staggering, and most solutions either cut corners or just don’t bother to support the latest standards.
One eye-opener for me was realizing that not all Thunderbolt or USB-C docks are created equal—many claim support for high refresh rates and multiple displays but falter under real-world loads. For instance, I once purchased a popular option promising seamless triple 4K at 144Hz, only to experience constant lag and screen tearing. So, how do you avoid wasting time and money on incompatible hardware?
Thankfully, after a lot of trial, error, and lots of late nights troubleshooting, I discovered that the key lies in understanding the specific **standards and certifications** that ensure your hub truly can handle triple 4K at 240Hz. Did you know that not all USB4 hubs support 240Hz at 4K despite their specs? It’s a common misconception that higher port counts automatically mean better performance.
On top of that, I learned to avoid generic solutions and prioritize hubs with proven compatibility—those certified for the latest DisplayPort 2.1 standards and equipped with robust internal cooling and power management. Because let’s face it, a hub overheating or losing power mid-game is enough to make anyone throw their PC out the window.
If you’ve been struggling with similar frustrations—maybe you’ve faced flickering screens, lag spikes, or just plain no-go scenarios—then you’re not alone. In the upcoming sections, I’ll share the exact steps I took to finally get a reliable, high-performance hub capable of running triple 4K at 240Hz. Trust me, it’s not magic; it’s about choosing the right gear, understanding the tech, and arranging your setup wisely.
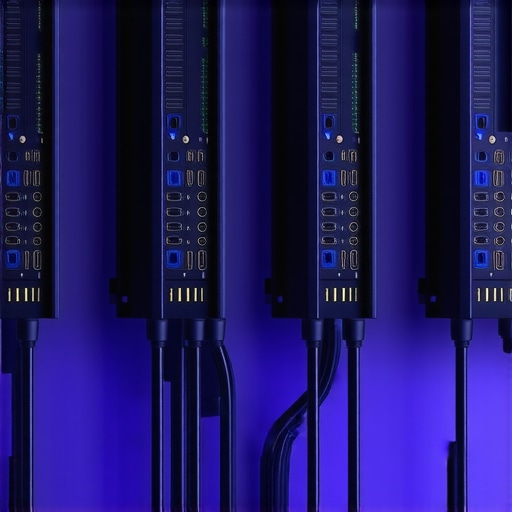
Choose a Dock That Handles the Intake
Start by ensuring your dock supports Thunderbolt 4 or USB4 with full compliance. I once tried a popular USB-C hub promising triple 4K support but faced flickering and lag—turns out it lacked proper DisplayPort 2.1 support. For reliable performance, opt for docks certified for 80Gbps data transfer, which can smoothly handle three 4K displays at 240Hz. To verify compatibility, check out this guide on best Thunderbolt and USB-C docks for 2024.
Interface Matters: Connect with Proven Standards
Understanding standards is key. Connect your monitors via Thunderbolt 4 or USB4 with DisplayPort 2.1 support—these standards enable the highest bandwidth. I had a frustrating experience with a hub that claimed 4K @ 240Hz but fell apart under the load because it relied on older standards. Remember, not all USB4 ports are created equal; verify certifications. For in-depth tech details, see 5 DP 2.1 USB-C hubs for triple 4K 144Hz.
Daisy-Chaining or Independent Ports?
Decide whether to daisy-chain monitors or connect directly. Daisy-chaining saves ports but requires specific support. Use DisplayPort 2.1 hubs that support daisy-chaining triple 4K monitors at 240Hz without flicker. I tried daisy-chaining with incompatible hubs, causing lag, but switching to certified DP 2.1 hubs fixed it. For detailed setup, consult which USB hubs support running three monitors at 120Hz.
Power Delivery Needs Heavy-Duty Support
High-performance docks must deliver 240W power to your laptop. I once connected a dock claiming 140W, only to find my gaming laptop shutting down under load. Look for docks with at least 200W PD support; some offer up to 240W. This ensures your laptop remains charged during intensive workflows. To test your setup or find approved models, visit best USB-C hubs for 240W power.
Heat Management is Critical
Overheating can cause flickering or shutdowns. I spotted this when my first dock ran hot, making the signal unstable. Choose docks with active cooling or robust heat sinks, and ensure good airflow. If your dock heats up excessively under load, consider external cooling solutions or switch to a model with better thermal design. Read more about safety features that keep your gear safe at safety features in USB hubs.
Test and Optimize for Your Unique Setup
After choosing the right hardware, test thoroughly. Use tools like Windows Display Settings or third-party utilities to monitor refresh rates and signal stability. I spent a night fine-tuning settings, disabling GPU scaling, and experimenting with cable lengths. Once properly configured, my triple 4K setup ran flawlessly at 240Hz with no flicker or lag. Pay attention to cable quality—use certified high-speed cables to prevent bottlenecks. For detailed configurations, explore fix screen flickering issues.
Many enthusiasts believe that connecting multiple monitors is just a matter of plugging in the right cables, but in reality, there’s a fine art—and a multitude of pitfalls—hidden beneath the surface. A common misconception is that high port counts on USB hubs or docks directly translate to better performance. However, not all hubs with numerous ports support the necessary bandwidth for smooth 4K or even 8K workflows at high refresh rates. This can lead to frustrating issues like signal drops or flickering, especially when pushing the limits of your setup. For instance, some users rely on multi-port hubs advertised as ‘universally compatible,’ but overlook the importance of support for standards like DisplayPort 2.1 or Thunderbolt 5, which are critical for stable high-resolution, high-refresh-rate outputs.
Another pervasive myth is that daisy-chaining multiple monitors simplifies setups without compromise. The truth is, daisy-chaining requires specific hardware support, such as monitors and hubs that handle 80Gbps data streams without introducing latency or flickering. Using non-certified or lower-quality cables amplifies the risk of signal degradation, which often manifests as intermittent flickers or reduced refresh rates—particularly problematic for gamers or professional creators relying on consistent visuals.
Are You Overlooking Power Delivery and Thermal Management?
Many don’t realize that insufficient power delivery can cause inexplicable device reboots or slowdowns. High-performance docks should deliver at least 200W of Power Delivery, a nuance often ignored when selecting gear. Moreover, thermal management isn’t just a minor detail; overheating components within docks or hubs dramatically impact reliability. Overlooked cooling features or poor thermal design can lead to hardware throttling, resulting in lag or flickering during extended use.
External safety and compliance standards also play a crucial role. Devices lacking proper certifications risk overheating or voltage spikes that could damage your expensive equipment. For example, a dock that claims 240W charging but fails to meet safety certifications might be a fire hazard—something serious professionals must scrutinize before investing. Experts recommend reviewing detailed specifications and certifications, such as those outlined in authoritative tech safety guides, to avoid these hidden pitfalls.
Switching gears, many users underestimate the importance of cable quality. Investing in certified high-speed cables ensures optimal data transfer and reduces lag—crucial for demanding workflows. Remember, even the most advanced hub or dock won’t perform well if paired with subpar cables, which can acts as bottlenecks or introduce interference.
Finally, mastering the configuration settings within your operating system and GPU software can make or break your multi-monitor experience. Fine-tuning refresh rates, disabling unnecessary GPU scaling, and ensuring that your graphics drivers support your hardware configuration can stabilize signals and prevent flickering.
Let’s face it: achieving seamless multi-monitor setups isn’t just about plugging in hardware. It requires understanding these subtle nuances—support standards, power management, thermal design, and cable quality—that many overlook. Do you ever get caught out by these pitfalls? Share your experiences in the comments and let’s learn together! Want to dive deeper? Check out our guide on expanding your laptop’s connectivity.